How Place Matrix Works
or How I learned to stop worrying and love staying up all night web programming again.In April of 2017 I spent an intense weekend building Place Matrix, which I announced here. TLDR; It's a website where you can toggle pixels on an LED matrix in my kitchen and watch the results through streaming video.

I had a great time building Place Matrix because it was an opportunity to learn about things with which I don't normally spend a lot of time. It was certainly my goal to build a robust and reliable system, but it was hard to know all of the best practices, let alone implement them in a weekend hack—this shows through in a few places. Nonetheless, I'm proud of the result and what I was able to build in a day and a couple of evenings of coding, and wanted to share some of the problems and solutions I encountered. I'm happy to get feedback on this article, both about the project and the presentation here. All of the source code is available at the end.
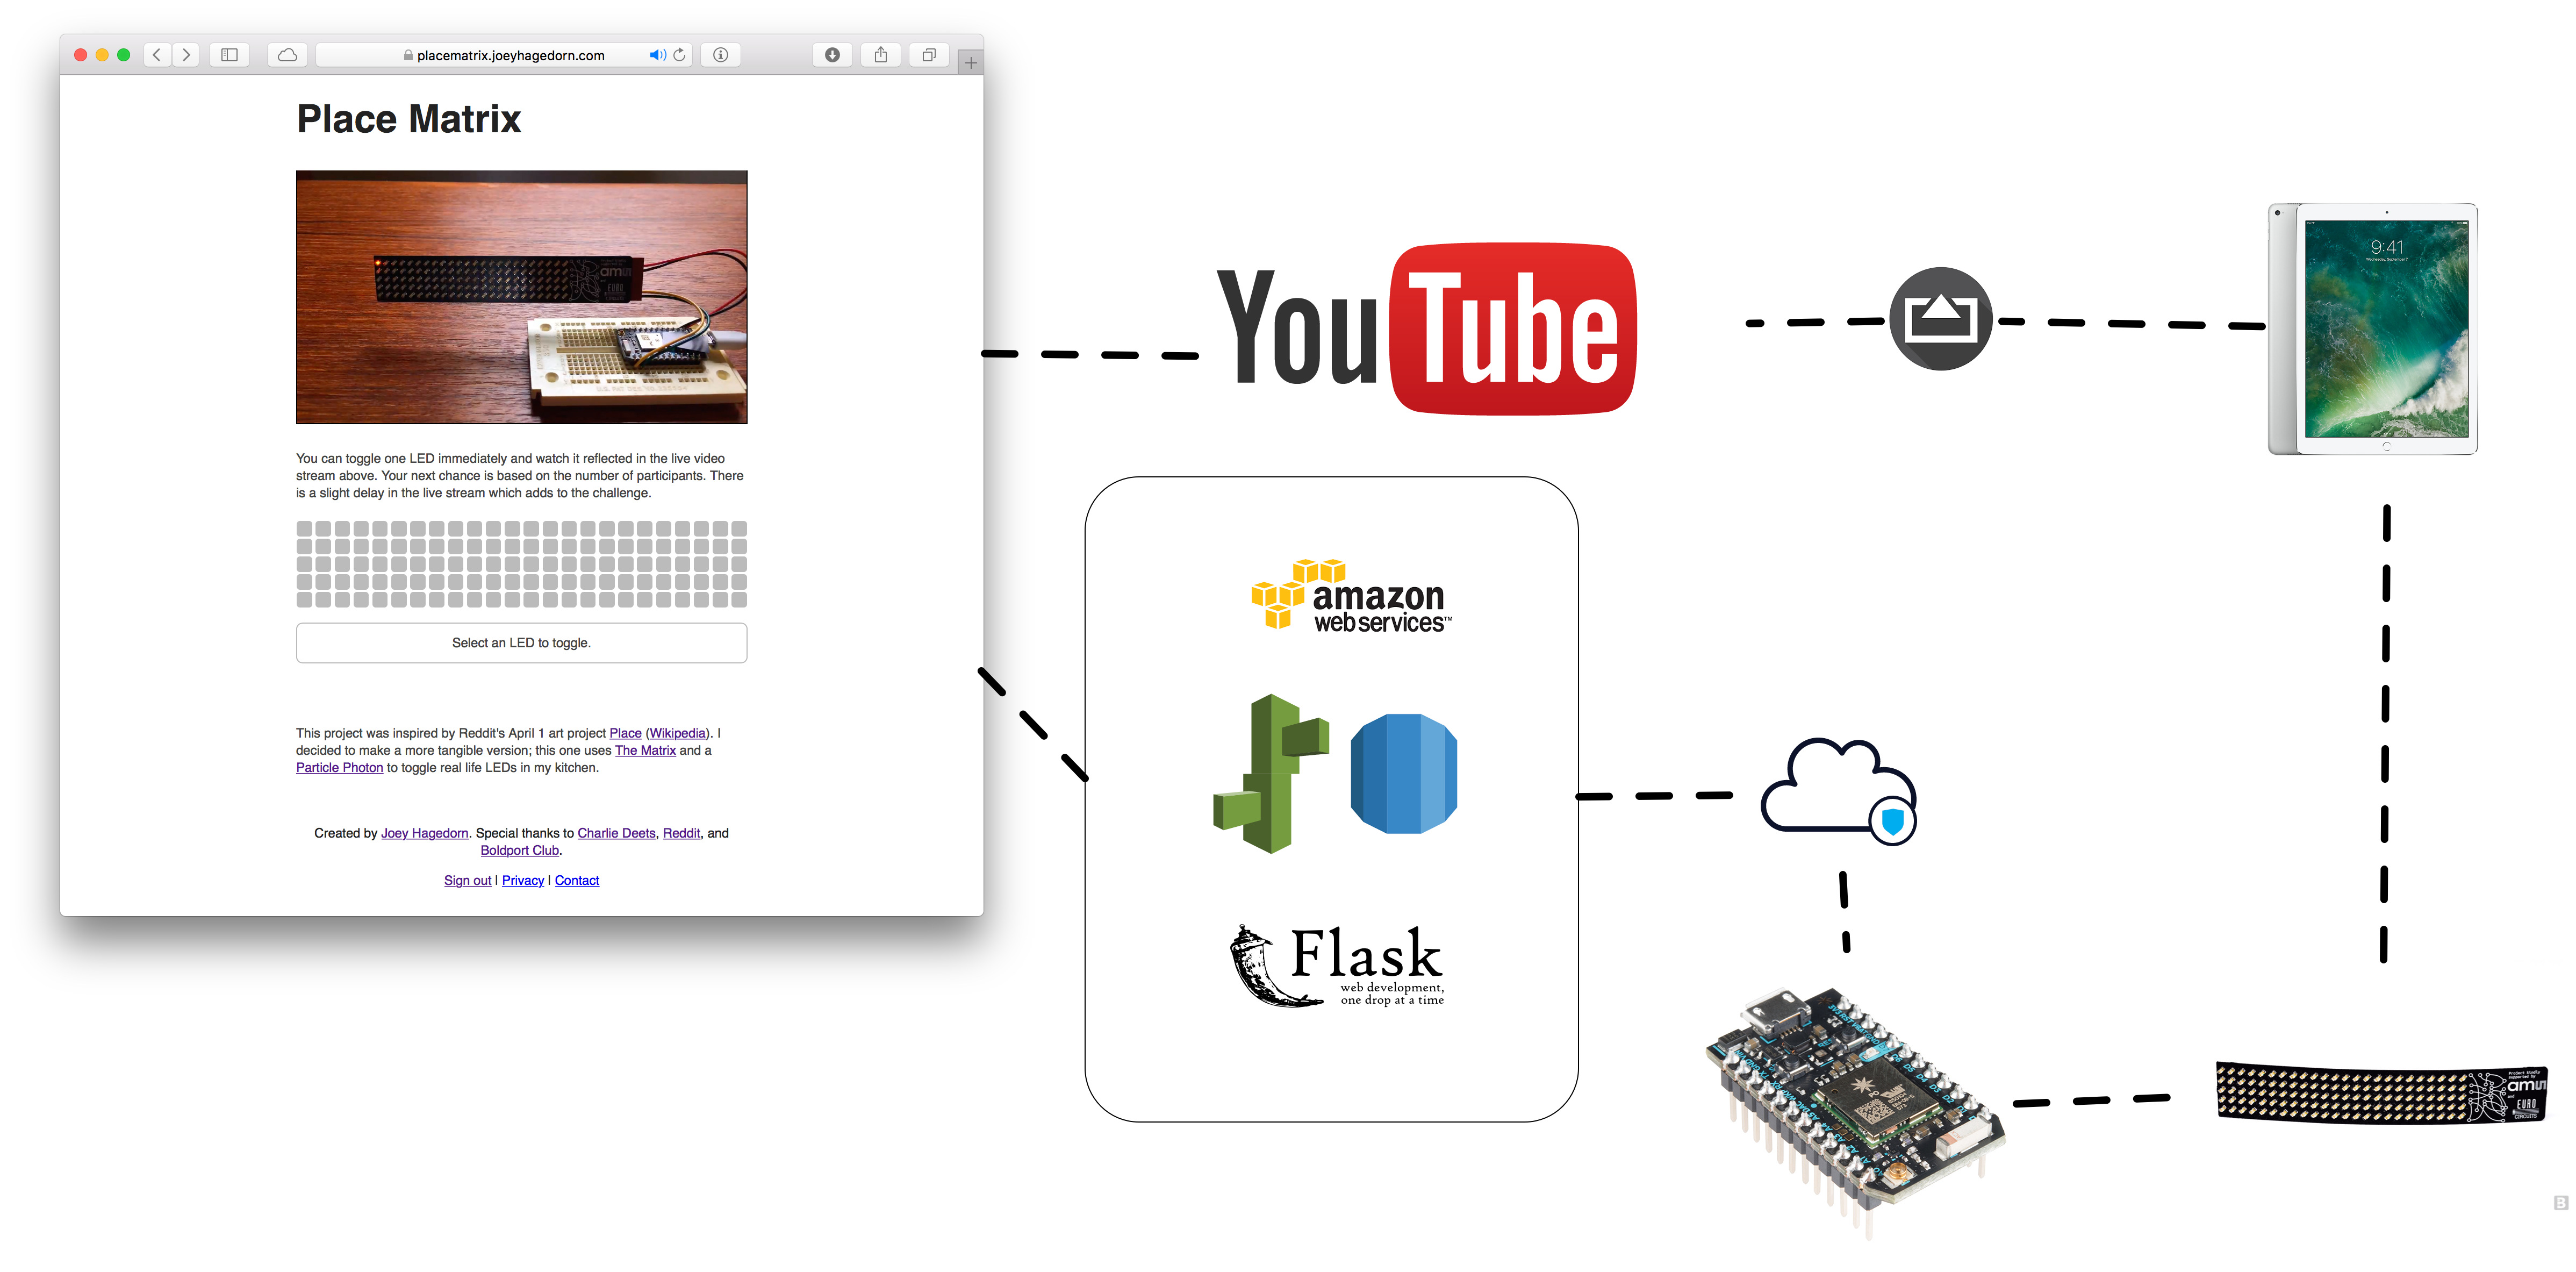
System Architecture
There are several major components to the Place Matrix system. First, there is a web application hosted on Amazon AWS. It is a Flask app written in Python, and hosted via Amazon's Elastic Beanstalk. EB set up a load balancer, allocated an EC2 instance, and configured and some other stuff automatically. There's an Amazon RDS hosted MySQL database that handles all of the persistent data, such as user information and the current state of the display. On the frontend, it's really just a bit of static HTML and Javascript. I used Google Sign-In to require authentication. Second, the hardware is implemented with a Particle Photon controlling The Matrix project from Boldport Club, which utilizes the AS1130 LED driver chip. Finally an iPad Pro streams video to an iMac, which relays the video to YouTube for streaming.
Hardware
The primary motivation for this project was to do something neat with The Matrix, a project I received as part of my membership to Boldport Club. The community is inspiring in what it does with each month's project. After soldering 120 LEDs and that tiny SSOP-28 packaged AS1130 chip, I was intent to find something worthwhile to do with this one. Reddit's Place project seemed like the perfect idea. I used a hot-air pencil and stenciled solder paste to solder all of the LEDs and drag-soldered the chip on the back. At first, all of the LEDs seemed to light up, but many were dim. I had figured I had overheated the LEDs when soldering, but the real problem was poor soldering of the chip. I suspect some unconnected lines, or perhaps a short (but maybe not dead short?) on the AS1130 pins could have caused this. Resoldering the chip, followed by thorough cleaning with a Q-tip and isopropyl alcohol, fixed it.
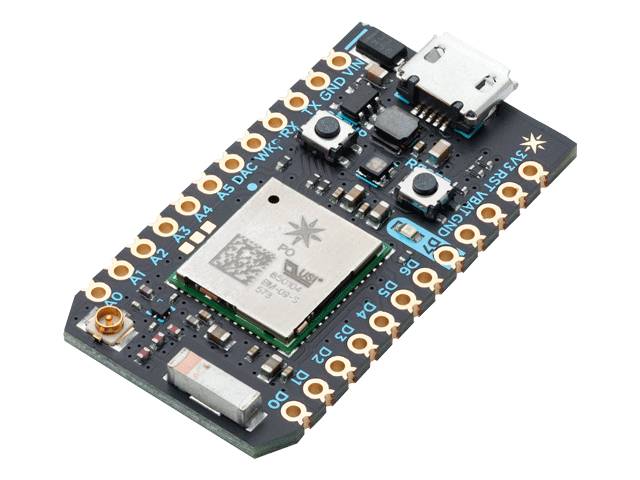
It was easy to wire this board to a Particle Photon that I had on hand. I crimped some pins for a Molex KK connector and used a solderless breadboard as a base on which I wired up power and SDA/SCL pins from The Matrix to the Photon. I had to shave the latching tabs off of the connector with an X-Acto knife to fit the connector housing.
Embedded Software
The first step in writing the software to run on the microcontroller was getting a development environment working. I like the Particle platform because it allows easy OTA firmware updates, but in this instance I got off on the wrong foot. I wedged two separate units such that they wouldn't be recognized by the Particle web IDE and exhibited the dreaded "dim blue LED" symptom. One of them would get physically hot, and the other just wouldn't seem to respond to commands to download code. The hot one appears to have been previously physically damaged, but the other just needed a fresh firmware download in DFU or Safe mode.
I didn't keep a perfect record of what commands were necessary to recover the Photon with the dim blue LED, but I believe it was as follows. I might have also used Safe Mode instead of DFU before running the "particle update" command.
- Download Photon Command Line Tools & native IDE
- Use Homebrew to install dfu-util
brew install dfu-util- Connect Photon to Mac via USB
- put Photon into DFU mode.
particle update- build sketch from the IDE against the latest FW version
- put particle into DFU mode again
particle flash --usb <compiled_file_name.bin>
Writing the embedded application was pretty easy and ended up being less than 100 lines of code. I used the LRAS1130 library to talk to the hardware. The code consists of two main functions; one takes a 4 character string that encodes a coordinate and toggles an LED, and the second takes a Base64 encoded string which represents a bit-array to refresh the whole display. Both of these functions are bound to the Particle Cloud, and thus can be called via a rest API. This made integration with the backend very simple. I needed Base64 encoding to efficiently pack the 120 bits of data into the argument string length limit of 63 characters. I had first implemented the dead simple toggle function, but realized I needed to be able to write the whole display for consistency and resilience to outages once operational. Before the project was done I also added an LED test function to the API so I could verify my soldering.
Once I setup the video stream I found the Particle status LED distracting, so I suppressed it in the nominal state using the following code:
void loop() {
    if (Particle.connected()) {
        if (!RGB.controlled()) {
            RGB.control(true);
            RGB.color(0, 0, 0);
        }
    } else {
        if (RGB.controlled()) {
            RGB.control(false);
        }
    }
}
The night before I launched the project I figured I should try to cleanup some solder joints. I spent quite a while resoldering that SSOP-28 package until I got consistently bright output. It was useful to look at the example wiring diagram in the AS1130 datasheet, which The Matrix adheres to, in order to figure out which pin on the chip was improperly soldered.
Unfortunately no matter what I did, I found the bottom two LEDs in the second column would not light. I resorted to probing signals at the LEDs with my oscilloscope, and though it was hard to interpret, I got the sense they were electrically connected but just weren't being commanded to turn on. At my wit's end, I tried using the LEDTest example included with the LRAS1130 library and was surprised to find all of the LEDs lit. After quite a bit of head scratching, I noticed user @tardate had committed a bug-fix to the library addressing a corruption issue. After pulling the latest version everything worked great. I'm greatful to Lucky Resistor and contributors to the library as it allowed me to focus on the app, rather than implement the protocol talk to chip. Couple of hours spent there, but I was happy to finally have success!
Backend
By far, the majority of the work went into the Flask web application. I picked Flask because I was already comfortable with Python and had previously built some simple server apps using Python. As an added bonus, the templating engine was familiar from my experience with Liquid, which I've used with Jekyll on this website.
I started by following an arbitrary tutorial to get the app up and running and talking to a database. It was pretty easy to rapidly iterate by running the development server locally and talking directly to the MySQL database hosted on AWS. This let me avoid setting up a local database server and having a different configuration for production. It also allowed me to just manually do database migrations as the datamodel changed. I added a couple of REST endpoints that were easy to call from Javascript on the page via XMLHttpRequests. I stripped out the existing functionality of the tutorial and my friend Charlie Deets helped me design the button grid and layout the content on the page. It took some work, but I managed to create a simple database model that would log each toggle request.
While I was reluctant to require login, it was the easiest path to prevent abuse of the system. I let Google handle the authentication, then eventually when I needed to block misbehaving users, it was easy to uniquely identify users and revoke access as necessary. I couldn't have built a competitive system without seriously rat-holing down some abuse prevention path.
It turned out that this early concern for abuse prevention was not unfounded. When I woke up the first morning after making Place Matrix live, I had found it had been defaced. I quickly hard-coded a block for the specific user, but that didn't last long because they had created several Google accounts to rapidly own the display. Another hour or two of coding let me add a flexible blocking mechanism to quickly disable any user. I had to block a couple more user names, but this was effective for the remainder of the time Place Matrix was active.
I used a special hidden page with logs of every pixel placement to find these malicious users. The data ended up being useful to replay the whole thing at the end for archival as well, and I hope it might be interesting for analysis. I was careful to anonymize the userIDs to avoid any privacy issue.
I encountered a couple of other interesting problems during development. At one point I had made some silly mistake, but in an effort to debug I tried deleting my Elastic Beanstalk instance and recreating a new one—which is when the interesting problem arose. I was actually unable to delete the Elastic Beanstalk instance because it had been manually added to a security group, according to the tutorial. I'm not sure if this manual creation of security groups is necessary anymore, but it was confusing that the instance could not be restarted until it was removed from the security group. I also had some issues with SQLAlchemy, but just kind of waved a dead chicken and called it a day, rather than get to the bottom of it.
I wanted to make sure that all of the clients connected to the application using SSL. Because the app was always served from the EC2 instance over HTTP and HTTPS was only applied at the load balancer, it was a little tricky to ensure clients were connected using the correct protocol. I was able to interrogate a header applied by the load balancer and redirect clients if they weren't connected securely using a before_request() handler in the Flask application:
@application.before_request
def before_request():
    if "X-Forwarded-Proto" in request.headers:
        if (request.headers["X-Forwarded-Proto"] == "http"):
            url = request.url.replace('http://', 'https://', 1)
            code = 301
            return redirect(url, code=code)
Video Streaming
The final piece necessary was to provide a live video stream on the page. I used Air Server on my iMac to receive and encode video from the camera app on an iPad to YouTube. I found occasionally the stream would go down, so it was essential to embed the live stream for my YouTube channel, as opposed to just a particular video, then configure it properly on the page. Eventually I figured out all of the necessary parameters of the iFrame API to get satisfactory results. Since this was active, YouTube has made it possible to stream directly from an iOS device which I suspect would eliminate some of the reliability problems and improve quality.
Shutting It Down
After a month or so and more than 200 users I took down the display and iPad to clear off my kitchen table. I was a bit lazy taking down the backend though, which I later came to regret.

The chart speaks for itself; the monthly cost of running even the simplest Elastic Beanstalk app was pretty high, especially for zero usage. Perhaps the cool name made me overlook the cost model; EB requires an AWS EC2 instance and a RDS db instance run 24/7 idly running my application. In retrospect, the extremely low usage was better suited for some sort of on-demand shared resource. I've since moved the archive page to static S3/CloudFront hosting and look forward to costs returning to the $1 range next month.
Source Download
I hope the source provided here can be of some use. I think some parts are a good example and would appreciate feedback on the rest. I've made a few tiny configuration changes to the LRAS1130 library to make it compatible with the Particle platform, which I've made available here too.